Often, when constructing models, we want to select their parts so as to change them as a group. The simplest way of selecting a model element is by left-clicking on them. Another common way is by selecting an area in the Graph View using the mouse. Everything in the area selected by the mouse will be selected. Adding new elements to the selected set can be accomplished by holding the SHIFT key when left-clicking on the mouse.
Edit Menu offers several other selection shortcuts that may make your life easier:
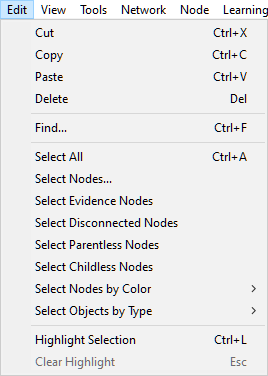
Select All, with a shortcut CTRL+A works in most views and selects all elements (for example, nodes, submodels, and all arcs between them) of the current Graph View window.
Select Evidence Nodes selects those nodes, for which the evidence has been set by the user. The function is dimmed out if no evidence is present in the model.
Select Nodes... dialog allows for sophisticated selection of nodes based on their names.
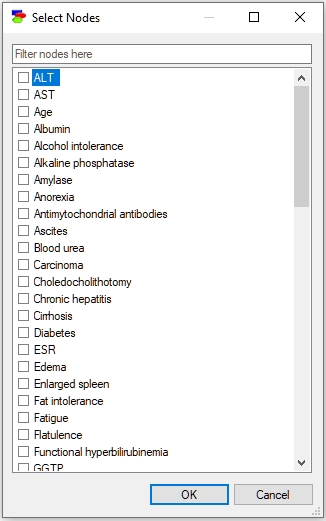
Check boxes next to variable names on the left-hand side allow us for selecting variables. All variables selected in the Graph View when invoking the dialog will have the check-box checked. Conversely, all variables with the check-box checked, will become selected in the Graph View when we exit the dialog.
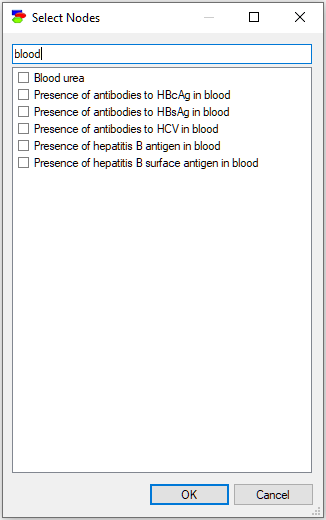
Given that a practical model may contains many variables (we have seen in our work with clients models as large as several thousand variables), locating and selecting them may be daunting. The filter field above the list of data columns serves for selecting columns. Typing anything in the filter field causes the dialog to limit the names of variables to those that match the filter. For example, typing "blood" into the above dialog will lead to the following selection:
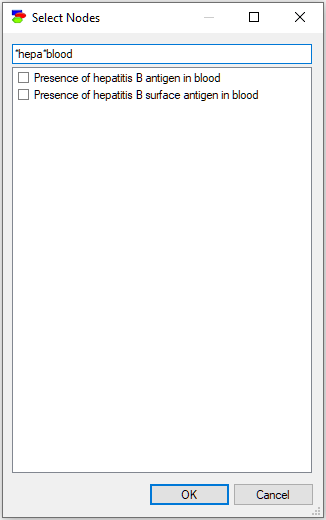
Letter case is ignored, so a lower case letter (e.g., "a") is equivalent to an upper case letter (i.e., "A"). In addition to regular characters, the filter field interprets wildcard characters, such as an asterisk (*) or a question mark (?) similarly to Windows. Typing "*hepa*blood" will select only those variable names that contain "hepa" string and end with "blood" string:
Any of the variables visible in the list can be selected or de-selected. Selection can be made by checking the small check-box to the left of the variable name or by pressing the space key. All highlighted variables will be selected or deselected by this. Right-clicking anywhere in the window brings up the variable list context menu:
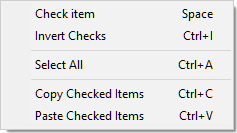
Check item (or pressing the space key) will change the value of the check-box: When it is check, it will be unchecked and when unchecked, it will be checked.
Invert Checks will invert all checks on the list.
Select All will highlight all nodes currently visible in the window. Subsequent pressing of the space key will select or deselect all of them but will have no effect on the remaining (currently invisible) model variables. There is no Select None choice in the menu but deselecting all nodes can be accomplished by selecting all nodes and pressing the space key once or twice (if the first pressing leads to selection).
Finally, the interface allows for copying and pasting the list of selected variables. These operations disregard the filter and copy/paste nodes from/to the entire model. Copy Checked Items places the list of the selected nodes (text format) on the clipboard. The clipboard format is multi-line text containing the names of items in the list. If, at some later stage, we select and copy the text list outside of GeNIe and choose Paste Checked Items, GeNIe will select only the variables on the list. Paste Checked Items command will remove the current check marks, unless the SHIFT key is pressed when command is invoked. This functionality is very convenient in case the list of variables is large and repetitive variable selection process is laborious.
Select Evidence Nodes, Select Disconnected Nodes, Select Parentless Nodes, and Select Childless Nodes help with model construction and navigation.
Select Nodes by Color submenu
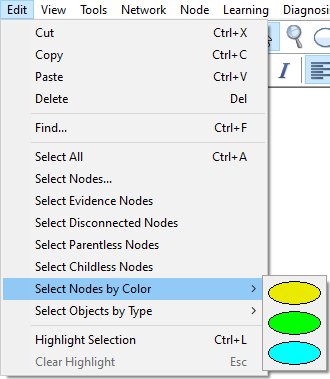
shows all colors used in the current model and allows to select only the nodes of a given color.
Select Objects by Type submenu
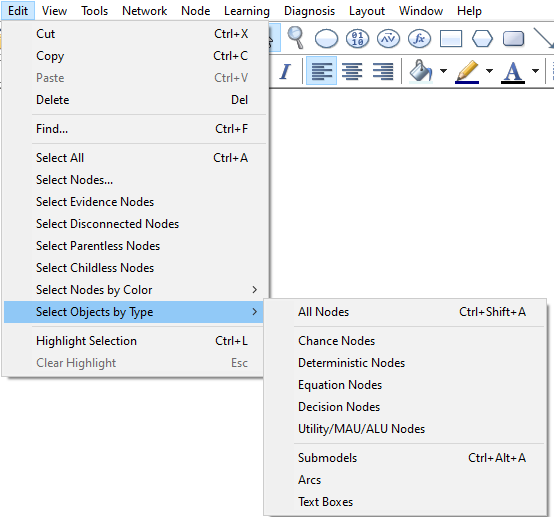
offers additional ways of selecting nodes.
All Nodes, with a shortcut CTRL-SHIFT-A, selects all nodes in the current Graph View. Please note that a similar command, Select All, selects all objects and that includes all submodels, arcs, text boxes, etc., while All Nodes selects only nodes.
Chance Nodes, Deterministic Nodes, Decision Nodes, Utility/MAU/ALU Nodes, selects all nodes of the corresponding type in the current Graph View.
Submodels (shortcut CTRL+ALT+A) selects all submodels in the current Graph View.
Arcs and Text Boxes select all arcs and text boxes in the current Graph View, respectively.
Selection of nodes by their diagnostic type
In addition to the above ways of selecting nodes, with diagnostic extensions turned on, Select Nodes submenu in the Diagnosis Menu allows for selecting all nodes belonging to one of the three types of diagnostic nodes, Faults, Observations or Auxiliary nodes.
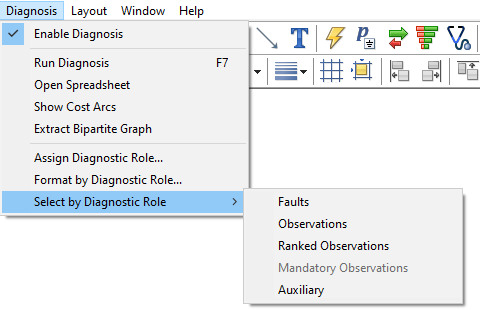
The typical application of this selection is joint editing of each type of nodes, for example coloring or displaying as bar charts.
Selection modifiers
Simple selection, such as rectangular selection and the selections by color, by type and by the diagnostic type can be modified by pressing the SHIFT key or CTRL and SHIFT keys simultaneously. Effectively, three selection modes are available:
•Default selection: When neither SHIFT nor CTRL keys are pressed, leads to selection of only objects selected. The remainder of the model elements becomes unselected.
•Add-to election: When the SHIFT key is pressed but CTRL key is not pressed, the objects selected by the selection operation are selected, the remaining model elements do not change their selection status.
•Invert selection: When both the SHIFT and the CTRL keys are pressed, the objects selected by the selection operation invert their selection status, the remaining model elements do not change their selection status.
For example, consider the Hepar II model. Let us select all model elements with Ctrl+A first, then go to the Edit Menu and Select Nodes by Color submenu. When keeping both SHIFT and CTRL pressed, we select yellow nodes. The selection status for yellow nodes will invert and everything except for yellow nodes will be selected.